75 gallon build journey

JayAlva

Active Member
Member
Messages
443
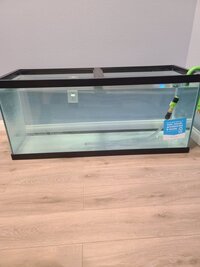
So.. as I am setting up to get my 45 transferred to my 75 I had been on another thread discussing Aqueon aquariums some said they've leaked this is my 3rd personal one first one this big. Long story short I test filled it over filled a little and found a leak near the top left side. I should be ok just resealing the top rim without having to remove the top right? I don't really feel like hauling it back to Petco. I marked where the leak was but I would go around the whole top with silicone.
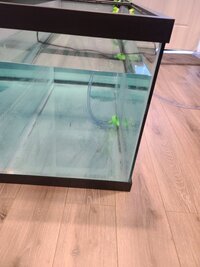
20200803_155900.jpg I did over fill it past where i would go I actually came close to overflowing it (got distracted)
 

Advertisement
Unfortunately, you can’t put new silicone/ sealant on top of cured silicone. You’ll have to carefully remove the rim, scrape off old silicone, and apply a new layer of aquarium sealant/silicone, then let it cure
 

Advertisement
  • Thread Starter
  • #3
What I was afraid of, Oh well guess I'll run it back to the store hopefully I'm able to exchange it

Returned leaky tank for another one hopefully better outcome. Interesting the aquarium on the bottom has a paper tab that says who made the aquarium this one is the same Jeff and number who made my other one. I'm pulling for you Jeff! Don't let me down15965634791613313018739286398317.jpg20200804_105519.jpg

Another interesting thing my floor isn't level going to definitely need to address that. 20200804_105807.jpg
 
  • Thread Starter
  • #5
Possibly why the last one leaked? Maybe it was flexing the tank when full?
That's what I was thinking I filled it to where I would max fill and I'd say one side is a quarter of an inch lower than the other
 
When I do WC’s I only fill our tanks to a millimeter or two below the lip on the top black rim. Be sure to get your stand nice n level and be sure the tank sits flush on all of its corners n u should be good to go
 

Advertisement
  • Thread Starter
  • #7
When I do WC’s I only fill our tanks to a millimeter or two below the lip on the top black rim. Be sure to get your stand nice n level and be sure the tank sits flush on all of its corners n u should be good to go
Ya I usually just fill so thatbthe water line isn't visible. I paid more attention this time.
 
  • Thread Starter
  • #8
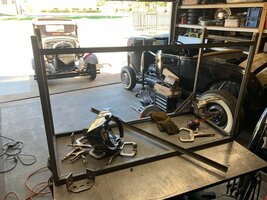
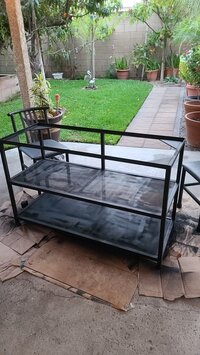
After contemplating going the less expensive route with the cinderblock stand I decided my floor was too unlevel to ever get it true. So I went with a steel stand with some leveling feet. Should be ready by sunday. Should i keep adding pictures as I go along or just wait til it's done?IMG_20200808_163544.jpgIMG_20200808_163547.jpg
 
After contemplating going the less expensive route with the cinderblock stand I decided my floor was too unlevel to ever get it true. So I went with a steel stand with some leveling feet. Should be ready by sunday. Should i keep adding pictures as I go along or just wait til it's done?View attachment 721571View attachment 721570
It’s up to you! Looking back on when I set up my tanks, I wish I had taken pictures as I went along so I could look back at my progression into what my tank is today. Personally I like seeing positive growth in things/projects I work on, and it’s sort of like “oh wow that happened. I went from [this] to [that] in [set] amount of time.”

But it’s completely up to you
 
  • Thread Starter
  • #11
One last center brace in the rear and then I'll be putting my Aquarium on it. Going to keep the bare metal look for a while eventually I'll use veneers and magnets to skin it. IMG_3362.jpgIMG_3360.jpg
 

Advertisement


  • Thread Starter
  • #12
Back brace added will place Aquarium on it later today and use the adjustable feet to level it out. Thinking 3-4 bags of Stratum? IMG_20200811_092253.jpgIMG_20200811_092255.jpg
 
  • Thread Starter
  • #14
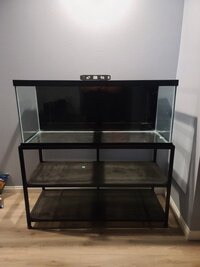
Over estimated my measurements so it's going to need some tweaking I just wanted to see how it looked on there I'm happy with it wish it would progress faster but that thing called life gets in the way.
So now looking at it should I split that open space on the bottom and add another shelf?
20200811_163002.jpg20200811_164452.jpg
 
Over estimated my measurements so it's going to need some tweaking I just wanted to see how it looked on there I'm happy with it wish it would progress faster but that thing called life gets in the way.
So now looking at it should I split that open space on the bottom and add another shelf?
View attachment 722296View attachment 722297
It might be useful for extra storage
 
  • Thread Starter
  • #16
It might be useful for extra storage
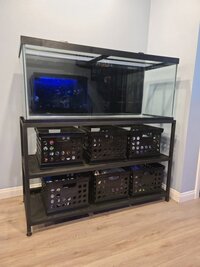
Ya I agree I can cut down the clutter and organize my supplies. The aquarium sits inside the channel of the angle steel but it doesn't have enough contact for my comfort so I'll add some more steel to make sure it has good contact but the leveling feet worked great. Trial and error.
 
  • Thread Starter
  • #17
20200822_121325.jpg20200822_121302.jpg

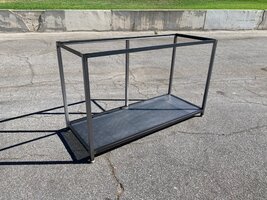
Stand ready for paint just waiting for when the weather isn't insanely hot to paint.
 
  • Thread Starter
  • #19
IMG-20200822-WA0022.jpeg
First coat on ran out of paint so going to pick up some more hoping to have Aquarium on top of tomorrow.
 
  • Thread Starter
  • #20
Came out happy with it cept the mesh shelf it was impossible to get it with a uniform spray maybe I should of rolled painted it but it's finally done tank will be up on it tomorrow
IMG-20200822-WA0042.jpeg
 
  • Thread Starter
  • #21
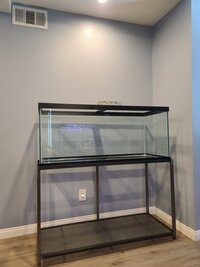
Well I'm like a little kid, I couldn't wait checked it and it was dry so tossed the tank on it. Really liking it. I vinyl wrapped the back of the tank and I really like how that came out. Hopefully I can start to move the build along. I still need lights and not sure about filter yet. Edit.. added a power strip attached it with magnets.20200822_212136.jpg20200822_212152.jpg20200823_102149.jpg
 

Advertisement


So now that you made one for yourself are you going to make one for everyone in the class ?
 
  • Thread Starter
  • #23
Organizing my Aquarium stuff from food,water treatment miscellaneous items I never knew I had that much.20200825_124108.jpg
 
  • Thread Starter
  • #24
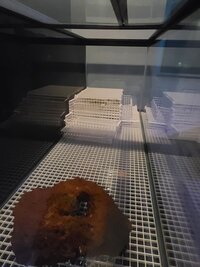
I was able to get some time building.. I guess a shell for a mound I want. Basically all this will be filled under with first layer lava rock then some gravel will be placed ontop of that then finally topped off with fluval Stratum. It's still a work in progress so it might change but I've been so busy lately that I unfortunately can't dedicate the time I wish for the build. But I want that one side to be raised then the other side flat. (Reflection of the 45 coming off the 75.)20200826_213336.jpg20200826_213411.jpg20200826_213424.jpg
 
  • Thread Starter
  • #25
I gave up on building a mound. With limited time and creativity block. I just ended up going with something simple.
Picture is right after I filled the tank and split one Amazon sword I believe and another plant I had that I can't remember.
20200830_123244.jpg
 
I gave up on building a mound. With limited time and creativity block. I just ended up going with something simple.
Picture is right after I filled the tank and split one Amazon sword I believe and another plant I had that I can't remember.
View attachment 726994
Sometimes simple is better in the long run. You should have great success with the Stratum from Fluval. I use it in my 2 gallon Nano tank and my plants are living it.
30329909-E21C-4C8A-AD78-91ED170E25DC.jpeg
here is a picture of my 75 gallon dirted. I layered my substrate. Eco complete, organic soil and medium coarse sand for the cap. My plants are living the organic soil.30329909-E21C-4C8A-AD78-91ED170E25DC.jpeg
 
  • Thread Starter
  • #28
Aquarium is clearing up I've been running a polishing filter on it thinking Thursday I'll put a seeded sponge filter and add a few fish I wanted to get out of a 26 gallon I have before tearing down my 45 and moving those fish into this tank.
20200901_101628.jpg
 
  • Thread Starter
  • #29
20200902_173630.jpg
Pulled out the rest of my plants left in my 45 gallon
Split up a pot of Pogostemon Stellatus Octopus, and a Java Fern pot. I haven't bought any plants yet but thinking I will just leave it and let it grow in before I consider any more plants.
 

Advertisement


  • Thread Starter
  • #33
Thank you to all that helped in other threads with my questions. And the kind comments.
Finally got all the fish into the 75.
20200908_111830.jpg
 
  • Thread Starter
  • #34
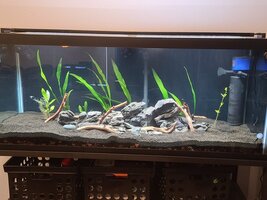
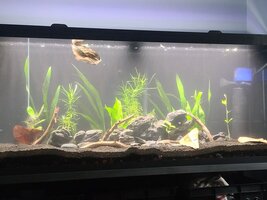
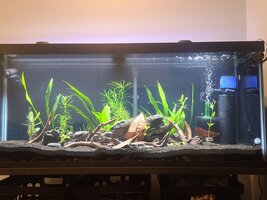
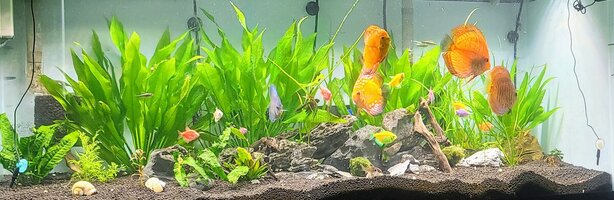
Wanted to add where I'm at currently with this build. Still getting use to the fluval 3.0 light I had an algae bloom.

20201201_105557.jpg20201201_105014.jpg
 
  • Thread Starter
  • #37
What temp do you keep the tank. It looks like you have young discus and rams that like it hot and glowlight tetra which prefer it not so hot and perhaps it is black neon tetra.
My temperature is as at 84 they're black neon tetra it's in the upper range of their temperature but they're doing well they were in warm water before I had my discus with Rams.
 
Looks like a plain sword plant, some pogostemon stellatus octopus, some java fern, hydro of some sort and a banna plant? If that is a banna plant have you had it long - i thought they required cooler temps (they always die on me).
 
Wow great build out!! Just seeing this. Nice cars in the garage too! Looks great! Luv the glo-tetras. Discus look great!!
 
  • Thread Starter
  • #41
Looks like a plain sword plant, some pogostemon stellatus octopus, some java fern, hydro of some sort and a banna plant? If that is a banna plant have you had it long - i thought they required cooler temps (they always die on me).
Spot on, naming them they're all simple plants that I just kept propagating and yes it's a banana plant I've had in there a few months l.
Spot on, naming them they're all simple plants that I just kept propagating.
This is stunning! Great work! Out of curiosity - what are the plants? It's really filled out nicely
They're all basic plants i just keep propagating them, hygrophila corymbosa is one of the easiest plants I've ever had, jake named the others It also has some valisneria , dwarf sagittarius , red melon sword,
 

Advertisement


  • Thread Starter
  • #42
Pulled out some of the plants opening up more space.
20201208_173326.jpg
 
How do you like the Fluval 3.0? Are you running one or two?
 
  • Thread Starter
  • #44
How do you like the Fluval 3.0? Are you running one or two?
I love it I'm running one it's a pretty strong light. I ran it too high of a spectrum for too many hours and had an algae breakout, once I turned it down the algae subsided and the plants are doing great.
 
I love it I'm running one it's a pretty strong light. I ran it too high of a spectrum for too many hours and had an algae breakout, once I turned it down the algae subsided and the plants are doing great.
Totally agree - it's a lot stronger than I imagined as well. For standard depth tanks, it's got great PAR (totally based on how dense my HC and Alterna Mini is growing).
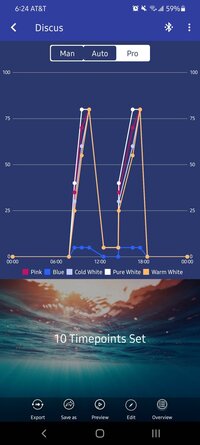
I love that you can tone down the blue spectrum as well - out of curosity; would you be able to post or share your lighting profile? I'm really curious how others run it.
 
I find the fluval 3.0 a bit weak for a 24 inch tank but for a shallower tank it is fine.
 
  • Thread Starter
  • #47
Totally agree - it's a lot stronger than I imagined as well. For standard depth tanks, it's got great PAR (totally based on how dense my HC and Alterna Mini is growing).
I love that you can tone down the blue spectrum as well - out of curosity; would you be able to post or share your lighting profile? I'm really curious how others run it.
This is how I'm currently running it I'm still tweaking the levels but it's cut my algae. I'm in the process of setting up my other 3 tanks with aquaskys to keep them synchronized and they're small shallow tanks.

Screenshot_20201220-182450_FluvalSmart.jpg
 
Thanks your Aquarium looks great.
Your welcome. I would love a big tank like yours. I think I would definitely make it into a species tank. Giants Danios in a tank that size and heavily planted would rock...!
 

Advertisement


Back
Top Bottom