
This was fun and looks awesome!
Step 1: Ninja a bunch of rocks!
Step 2: Buy a bunch of aquarium silicone! (I used 2 and a bit tubes on a 45g)
Step 3: Buy a bunch of fine gravel or sand!
Step 4: Wash everything thoroughly! Allow to dry!
Step 5: Apply sillicone to your rocks, one at a time, start from the bottom and glue them straight to the back of your tank wall!
Step 6: Do one or two 'levels' at a time, squeeze some sillicone between the gaps in the rock, then drop some gravel/sand straight onto the wet sollicone, press it in hard!
Step 7: Let it dry for 5-10 minutes(make sure the rocks aren't going anywhere), prop the tank up so that the loose gravel falls away, you might have to very lightly brush it, them work on the next layer of rocks!
Step 8: Finish what you started!
Step 9: Stand back and admire your work (5-10 minutes should be sufficient) then get back to work!
Step 10: Because the silicone is clear, you may notice some light coming through from the back of the tank, to prevent this, I gaffa taped black card to the back, blocking all light!
Step 11: Let that sucker dry, go have a beer and relax!
I left mine to dry for a good week before filling it, it looks wicked and I will definitely do it again!
You can be pretty artistic with the rocks, sillicone is pretty strong, I used flat rocks jutting out to make small shelters and rest ledges!
Yes, its relatively permanent but when it looks that good, who cares!
Enjoy!

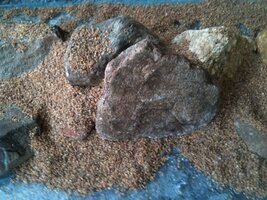

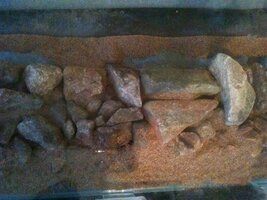

Here it is next to my 55 gallon!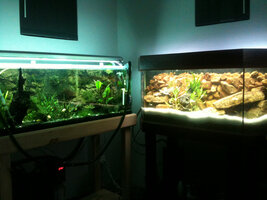
Step 1: Ninja a bunch of rocks!
Step 2: Buy a bunch of aquarium silicone! (I used 2 and a bit tubes on a 45g)
Step 3: Buy a bunch of fine gravel or sand!
Step 4: Wash everything thoroughly! Allow to dry!
Step 5: Apply sillicone to your rocks, one at a time, start from the bottom and glue them straight to the back of your tank wall!
Step 6: Do one or two 'levels' at a time, squeeze some sillicone between the gaps in the rock, then drop some gravel/sand straight onto the wet sollicone, press it in hard!
Step 7: Let it dry for 5-10 minutes(make sure the rocks aren't going anywhere), prop the tank up so that the loose gravel falls away, you might have to very lightly brush it, them work on the next layer of rocks!
Step 8: Finish what you started!
Step 9: Stand back and admire your work (5-10 minutes should be sufficient) then get back to work!
Step 10: Because the silicone is clear, you may notice some light coming through from the back of the tank, to prevent this, I gaffa taped black card to the back, blocking all light!
Step 11: Let that sucker dry, go have a beer and relax!
I left mine to dry for a good week before filling it, it looks wicked and I will definitely do it again!
You can be pretty artistic with the rocks, sillicone is pretty strong, I used flat rocks jutting out to make small shelters and rest ledges!
Yes, its relatively permanent but when it looks that good, who cares!
Enjoy!
Here it is next to my 55 gallon!


